If your household is like ours, the art you buy doesn’t always make it on to the walls. For us it is a combination of already full walls and competing priorities. If however your walls remain bare because you find hanging art frustrating, intimidating, or simply fiddly, what follows should help.

Let me begin by saying there is more than one way to hang art, and this is simply the method that has worked for me. If you have approaches that could help others, please share them in the comments below.
Selecting A Frame
The first step is to get the piece into a frame, if it did not come in one. A quality frame will enhance the piece of art both aesthetically and in terms of longevity. In selecting a frame, your budget should be proportional to the quality and investment of the art itself. An original work or high-quality limited-edition print deserves a high-quality frame and UV-filtering glass or acrylic to protect the piece from fading. Similarly, if it is an inexpensive high-volume print, don’t break the bank on the frame.
Preparing The Frame To Hang
If your artwork is in an 11” x 14” or larger frame, I recommend using D-rings and picture hanging wire on the back rather than sawtooth hangers. The D-rings should be attached about 1/3 of the way down height of the frame. I have found that a vinyl-coated stranded wire works best. Begin by attaching the wire to one D-ring with a Lark’s Head Knot (see diagram) and then wrap the tail around the wire 8 – 10 times and cut off any excess wire. This will assure a secure no slip connection. Allow enough wire so that tied off on both sides and then pulled taught the wire is at least 30° above horizontal. To make hanging on the wall easier, if you are wiring multiple frames, make the distance between the top of the taught wire and the top of the frame the same on all your frames. We will see why this is helpful later. Tie off the wire on the other D-ring with a Lark’s Head Knot and 8-10 wraps as before. The last step before hanging is to place rubber bumpers on the bottom corners. This will help protect your walls and aid the picture in hanging parallel to the wall and less likely to go crooked over time.
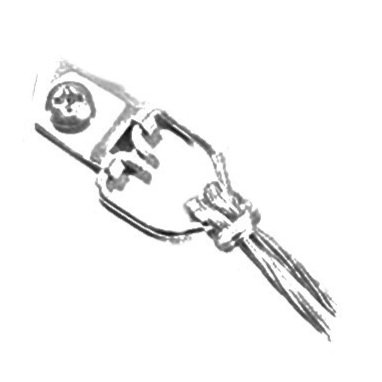
D-ring and wire

Finished wire
Arranging Art On The Wall
Every room is different, so I will simply provide a few guidelines to get you started. Just light the rules of composition, these guidelines can be broken when the design requires it. Generally speaking, I suggest hanging the artwork such that the center of the piece or the subject is at eye level. In terms of horizontal placement, the art in any given stretch of wall should be proportionate to the space. A single small piece on a large wall will get lost and look out of place. Likewise, packing lots of art on a wall with little space around each piece will look crowded and overly busy. When hanging multiple pieces together, the spaces between the edges of the frames should be equal or at least proportional to the works. Allowing adequate spacing is critical, just as the use of negative space is critical to a well composed work of art.
If all of the pieces to be hung on a stretch of wall are the same size, placement is easy. They will be hung at the same height with the space between equal and the spacing on the outside to the corners of the room equal or greater than the space between the works.
Measurements And A Sketch
Sketch of wall and wart with measurements
In this case, I am hanging two square frames whose outside dimensions are 23¾” x 23¾” and the wall section is 98” long. I have elected to space them 12” apart, which is roughly half the width of each piece. This leaves 19¼” on the outside of the pair to the corners. This works nicely as it is a little over ¾ of the width of each piece, creating a balance amount of negative space around the two works.

Establishing centerline
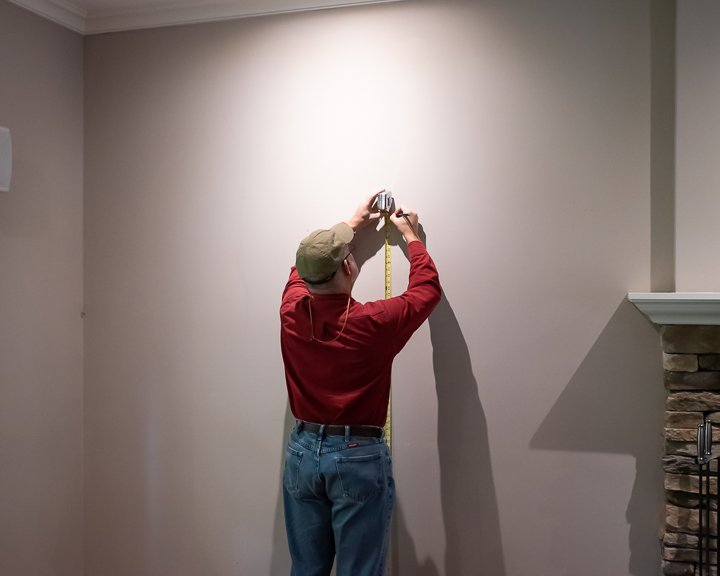
Measuring and marking picture hook height
When hanging larger works (anything over 12” wide) I recommend using two picture hooks. This will help the frame hang parallel to the wall and minimizes the accidental movements that will cause a piece to hang crooked. Clearly, placing two hooks on the wall at e correct height is a bit more complicated than using a single hook but fear not. With a few quick measurements and some basic arithmetic, you’ll get it right on the first try!

Measuring Wire Drop
The distance between the two hooks should be approximately ⅓ the width of the frame, in this case, 8” will due nicely. For me the span between my thumb and pinky when spread as far apart as I can is just shy of 8” so using one hand with thumb and pinky spread I put just enough upward tension on the picture wire to hold it taught and with the other hand measure down from top of the frame to determine the distance below the top of the frame to place the hooks on the wall. Here I measured approximately 3¾”. I call this the “wire drop” and now have what I need to figure out the hook placement.
I draw a quick sketch of the wall and the outlines of the frames to be hung. Then I write the following measurements on the sketch. Distance from the floor to eye level (63” for me), distance between the frames (12”, see above), width of wall (98”, see above) and distance to centerline (half the width or 49” in this case), dimensions of frames (23¾” x 23¾”, see above), wire drop distance (3¾”, see above).
Some Basic Arithmetic
Now for the basic arithmetic. If the center of the frame is at eye level (63”) and the frame is 23¾” tall, then the distance from the center to the top of the frame is half the frame height, or 11⅞”. Add that to the eye level measurement and you have the height of the top of the frames (74⅞”). Then subtract the wire drop and you have the height of the picture hooks above the floor (71⅛). I then write the picture hook height dimension on the sketch. Next, I calculate the distance from the centerline to the inside picture hooks. I found the distance from the edge of the frame to one of the hooks by subtracting the hook spread (8”) from the width of the frame (23¾”) then divide the result by 2 to get a distance of 7⅞”, then adding that to the distance from the centerline to the edge of the frame is 6” (half of the space between the two frames) gave me 13⅞”.


Measuring from centerline to inside hooks
Placing The Hooks On The Wall

Start hooks just above pencil marks
Now that I have all of the measurements on the drawing, I begin transferring them to the wall. I measure along the top of the baseboard from the corner over to the point of the centerline (49”) and make a small pencil mark. I then measure up to picture hook level (71⅛”) and make another small pencil mark. To double check I measure from the corner out to the centerline at picture hook level and adjust my pencil mark as needed. If you have a 24” bubble level with a ruler marking the hook placement is a snap. I assume most folks do not so I will continue with just the tape measure and pencil. Measure from the centerline over to the inside hooks (13⅞”) and make a mark.
Then I measure up from the floor to picture hook level at the mark, and adjust the height as needed. Then I measured over the hook spread (8”) and made a mark and once again measured up from the floor at the mark to picture hook level and adjusted as needed. I repeated this process for the second frame, so I then had marks for all four picture hooks.
I selected picture hooks that rated well in excess of the weight of the framed artwork. In this case I used 20lbs. hooks. Placing the bottom of the hook (not the nail) just above each of the picture hook marks, I drove the nails in with a hammer. As I drove the nails in the hooks slid down the wall a bit and now the bottom of the hooks are on the marks. Don’t worry if they are not perfectly level. You will be able to hang them level, even if your hooks are off by a bit.
By assuring that both pictures’ wires had the same wire drop, I only had to make one set of calculations. If the wire drops were different, I would have had to measure and calculate hook placement for each frame.

With the hooks in place, hanging each of the frames was easy. Once hung, I measured the distance between the frames at the top and bottom of the frames to assure they were parallel and measured from the floor or ceiling to the top of the frames to assure they were level or at least parallel to the floor or ceiling. In older homes, parallel is better then level as the walls are not always plumb and the floor not always level. So with a little bit of planning, measuring, and some arithmetic, you too can hang your art like a pro!


